carucior_pramy_luxe
TRANSCRIPT
8/6/2019 carucior_pramy_luxe
http://slidepdf.com/reader/full/caruciorpramyluxe 1/17
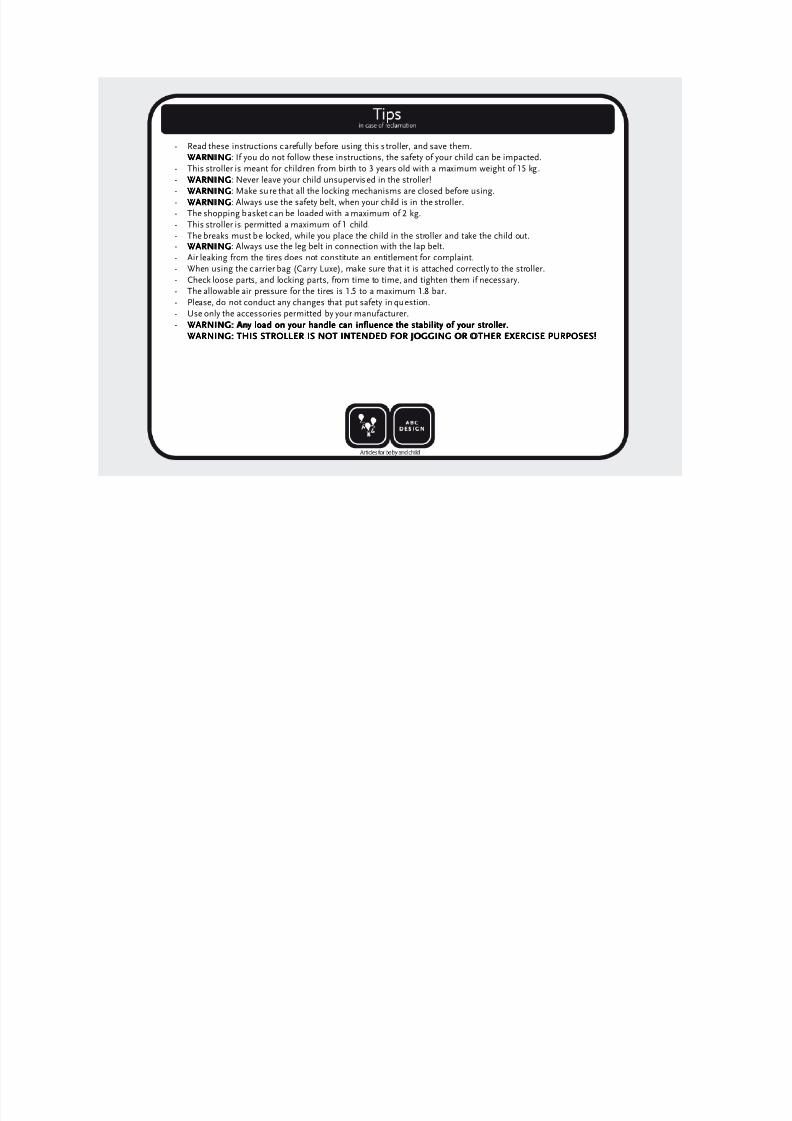
-
Pramy Luxe
- Frame made of Aluminum- Carrier bag included- Pocket and window on the roof - Height Adjustable Handle- Adjustable 3 position back rest
- Suitable for children 0 - 3 years of age(max. 15 kg )
- Weight: 17.2 kg- Tested according to EN 1888 : 2005
This stroller is not intended forThis stroller is not intended forThis stroller is not intended forThis stroller is not intended forjogging or other exercisejogging or other exercisejogging or other exercisejogging or other exercise
purposes.purposes.purposes.purposes.
8/6/2019 carucior_pramy_luxe
http://slidepdf.com/reader/full/caruciorpramyluxe 2/17
Dear Customer,
Congratulations on the purchase of your ABC-Design Stroller. We are pleased that you have chosen one of our products and hope that you will becompletely satisfied with the se rvice you receive from the product. We advise you to read the Instruction Leaflet carefully before use of the pram and then to keep it in a safe place. If you fail to do this the safety of your child can be jeopardised. Kindly pay attention to the washing and careinstructions so that you enjoy long and trouble free use of your new purchase.
Your ABC-Design Team
Hints for care and useHints for care and useHints for care and useHints for care and use
1. The manufacture of materials used in the fabrication of this product meet the standards required by the AZO, EN71-2 und EN71-3. for clothing
claimed light originality values. However, we advise you not to expose the product to the sun for a long time. Attrition and fading of colours duringheavy solar radiation do not justify a damage claim. The fabric case of your stroller is washable. You can wash the case by hand or machine coldwash.
2. Each product frame is manufactured according to EN 1888: 2005 standards. To maintain the safety of your product, the moving componentsmust be lubricated regularly and if required rerivetted.Look out: Use only silicon-oil or silicon-spray for oiling.
3. Regular care and maintenance contribute to the safety and longevity of your product. Environmental influences such as s alty air, road strewn saltor acid rain as w ell as outdoor storage contribute towards corrosion. Therefore always store your pram indoors.
4. We recommend regular maintenance of all varnished components. Should the frame and varnished components become soiled use a dampcloth moistend with water diluted mild detergent to wipe away the dirt.
5. Damaged air tubes are no reason for reclamation. Spare tubes can be bought in all retail shops.
By adhering to the aforementioned hints you will enjoy satisfactory use of your ABC-Design product for a long time.
page 2

8/6/2019 carucior_pramy_luxe
http://slidepdf.com/reader/full/caruciorpramyluxe 3/17
1. Opening the Stroller1. Opening the S troller1. Opening the Stroller1. Opening the S troller
Pull the handle up.
Press the handle toward the back, until the joints lock inplaceon the left and right.
WARNING:WARNING:WARNING:WARNING: Please make sure that all locks are closedbefore using.
2. Assembling the Wheels2. Assembling the Wheels2. Assembling the Wheels2. Assembling the Wheels
Place the wheels on the axles as showing in the photo.
Press the wheel on the axle until it locks in place.
Make sure the wheels are firmly locked in place.
page 3
8/6/2019 carucior_pramy_luxe
http://slidepdf.com/reader/full/caruciorpramyluxe 4/17
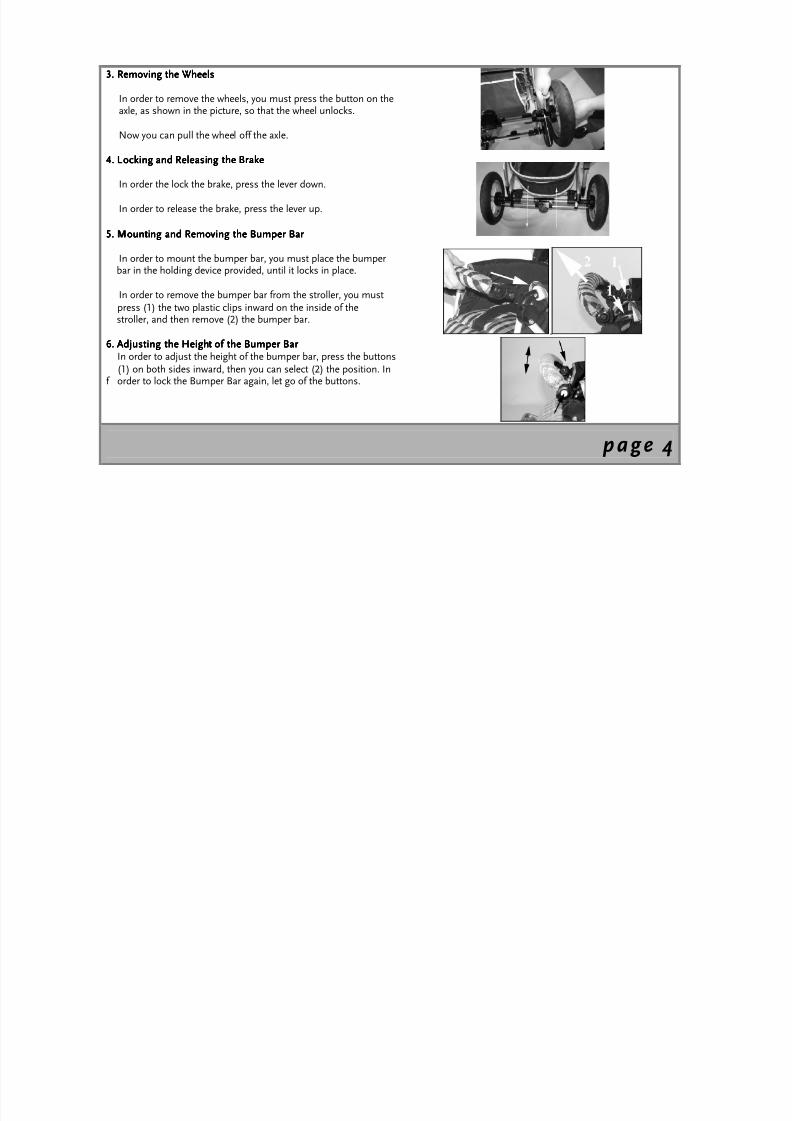
3. Removing the Wheels3. Removing the Wheels3. Removing the Wheels3. Removing the Wheels
In order to remove the wheels, you must press the button on theaxle, as shown in the picture, so that the wheel unlocks.
Now you can pull the wheel off the axle.
4. Locking and Releasing the Brake4. Locking and Releasing the Brake4. Locking and Releasing the Brake4. Locking and Releasing the Brake
In order the lock the brake, press the lever down.
In order to release the brake, press the lever up.
5. Mounting and Removing the Bumper Bar5. Mounting and Removing the Bumper Bar5. Mounting and Removing the Bumper Bar5. Mounting and Removing the Bumper Bar
In order to mount the bumper bar, you must place the bumperbar in the holding device provided, until it locks in place.
In order to remove the bumper bar from the stroller, you mustpress (1) the two plastic clips inward on the inside of thestroller, and then remove (2) the bumper bar.
6. Adjusting the Height of the Bumper Bar6. Adjusting the Height of the Bumper Bar6. Adjusting the Height of the Bumper Bar6. Adjusting the Height of the Bumper BarIn order to adjust the height of the bumper bar, press the buttons(1) on both sides inward, then you can select (2) the position. In
f order to lock the Bumper Bar again, let go of the buttons.
.
page 4
8/6/2019 carucior_pramy_luxe
http://slidepdf.com/reader/full/caruciorpramyluxe 5/17
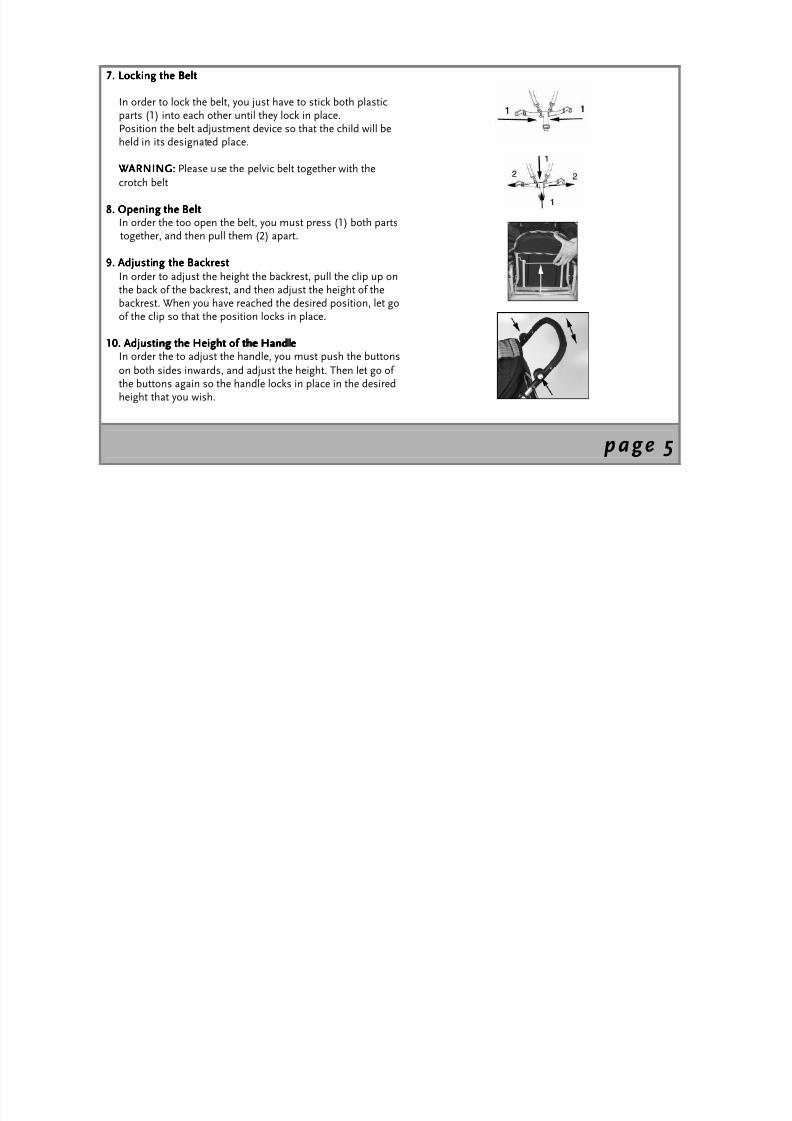
7. Locking the Belt7. Locking the Belt7. Locking the Belt7. Locking the Belt
In order to lock the belt, you just have to stick both plasticparts (1) into each other until they lock in place.Position the belt adjustment device so that the child will beheld in its designated place.
WWWWARNINGARNINGARNINGARNING:::: Please use the pelvic belt together with thecrotch belt
8. Opening the Belt8. Opening the Belt8. Opening the Belt8. Opening the BeltIn order the too open the belt, you must press (1) both partstogether, and then pull them (2) apart.
9. Adjusting the Backrest9. Adjusting the Backrest9. Adjusting the Backrest9. Adjusting the BackrestIn order to adjust the height the backrest, pull the clip up on
the back of the backrest, and then adjust the height of thebackrest. When you have reached the desired position, let goof the clip so that the position locks in place.
10. Adjusting the Height of the Handle10. Adjusting the Height of the Handle10. Adjusting the Height of the Handle10. Adjusting the Height of the HandleIn order the to adjust the handle, you must push the buttonson both sides inwards, and adjust the height. Then let go of the buttons again so the handle locks in place in the desiredheight that you wish.
page 5
8/6/2019 carucior_pramy_luxe
http://slidepdf.com/reader/full/caruciorpramyluxe 6/17
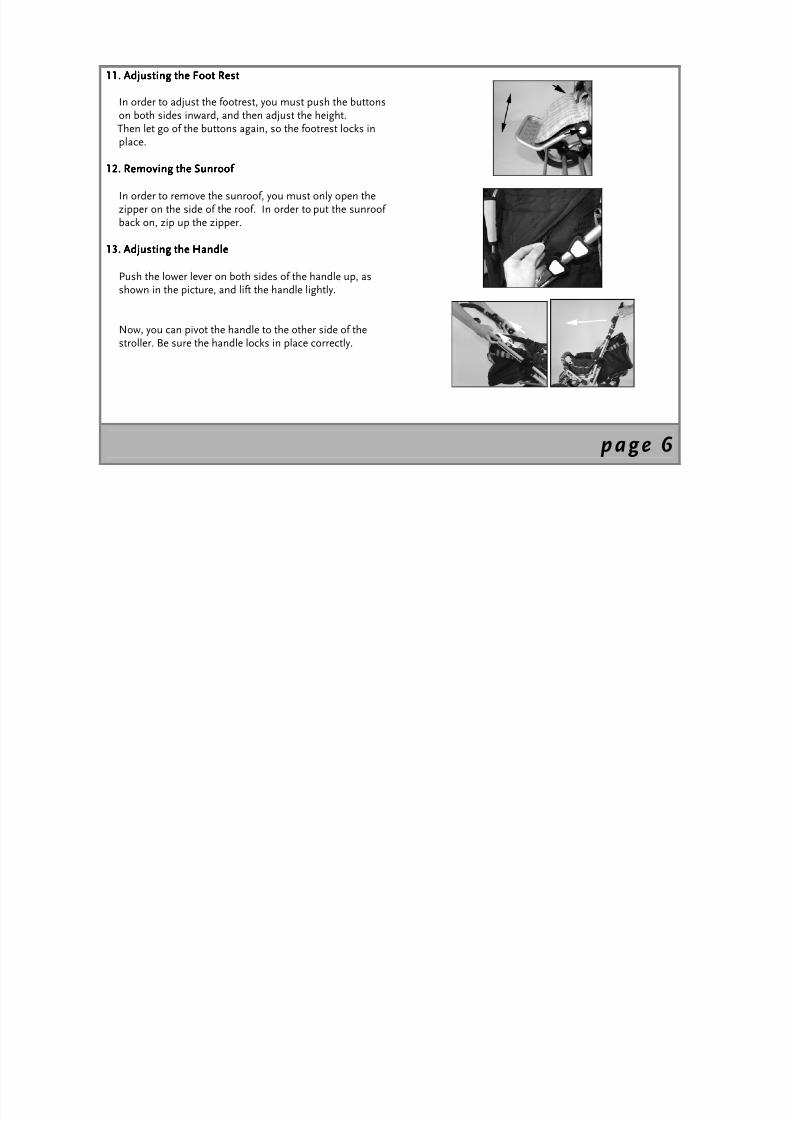
11. Adjusting the Foot Rest11. Adjusting the Foot Rest11. Adjusting the Foot Rest11. Adjusting the Foot Rest
In order to adjust the footrest, you must push the buttonson both sides inward, and then adjust the height.Then let go of the buttons again, so the footrest locks inplace.
12. Removing the Sunroof 12. Removing the Sunroof 12. Removing the Sunroof 12. Removing the Sunroof
In order to remove the sunroof, you must only open thezipper on the side of the roof. In order to put the sunroof back on, zip up the zipper.
13. Adjusting the Handle13. Adjusting the Handle13. Adjusting the Handle13. Adjusting the Handle
Push the lower lever on both sides of the handle up, as
shown in the picture, and lift the handle lightly.
Now, you can pivot the handle to the other side of thestroller. Be sure the handle locks in place correctly.
page 6

8/6/2019 carucior_pramy_luxe
http://slidepdf.com/reader/full/caruciorpramyluxe 7/17
14. Folding up the Stroller14. Folding up the Stroller14. Folding up the Stroller14. Folding up the Stroller
Attention: The handle must first be on the canopy side of the stroller!
Pull the two upper levers on the handle up, as shown in thephoto. Then, push the handle lightly forward, until you noticesome resistance.
Now, release the second safety that is found on the bottomright of the stroller.
You can now fold up the stroller, as shown in the photo, byturning over the handle completely.
Remarks: To unfold the stroller, you proceed, as in Point 1“Opening of the Stroller".
WARNING:WARNING:WARNING:WARNING: Please make sure that all locks are closed
before using.
page 7
8/6/2019 carucior_pramy_luxe
http://slidepdf.com/reader/full/caruciorpramyluxe 8/17
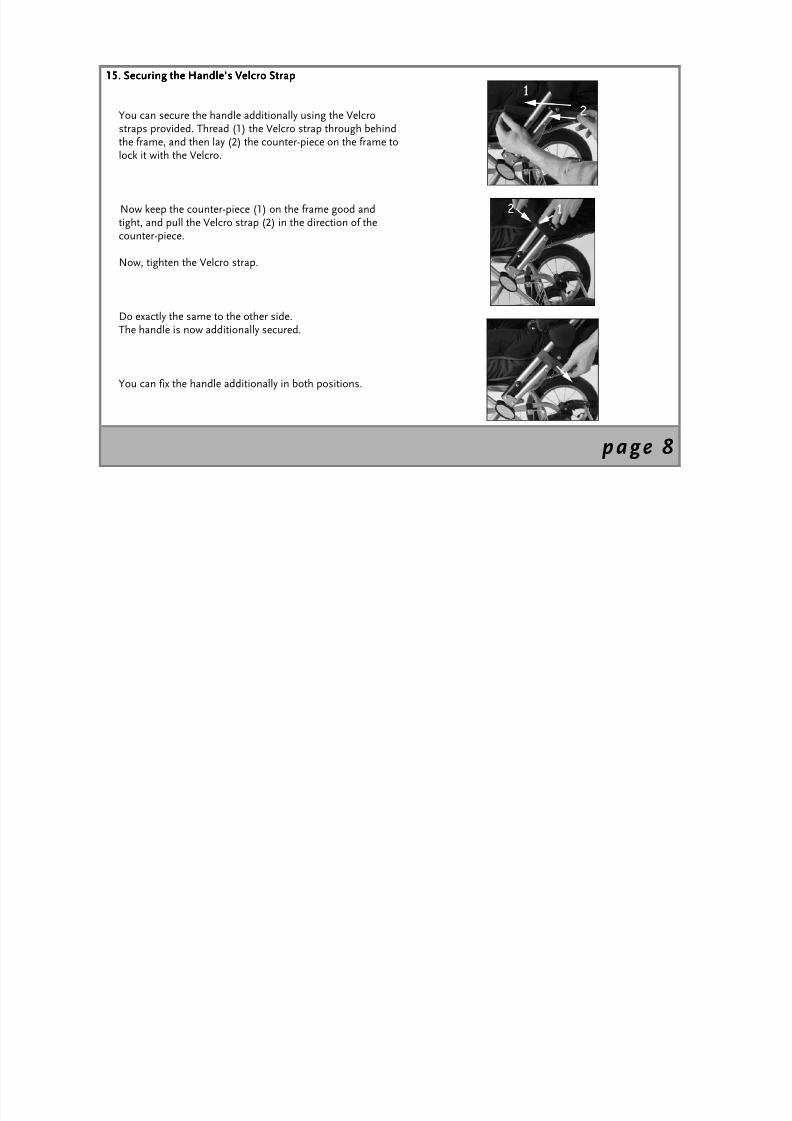
15. Securing the Handle's Velcro Strap15. Securing the Handle's Velcro Strap15. Securing the Handle's Velcro Strap15. Securing the Handle's Velcro Strap
You can secure the handle additionally using the Velcrostraps provided. Thread (1) the Velcro strap through behindthe frame, and then lay (2) the counter-piece on the frame tolock it with the Velcro.
Now keep the counter-piece (1) on the frame good andtight, and pull the Velcro strap (2) in the direction of thecounter-piece.
Now, tighten the Velcro strap.
Do exactly the same to the other side.The handle is now additionally secured.
You can fix the handle additionally in both positions.
page 8
8/6/2019 carucior_pramy_luxe
http://slidepdf.com/reader/full/caruciorpramyluxe 9/17
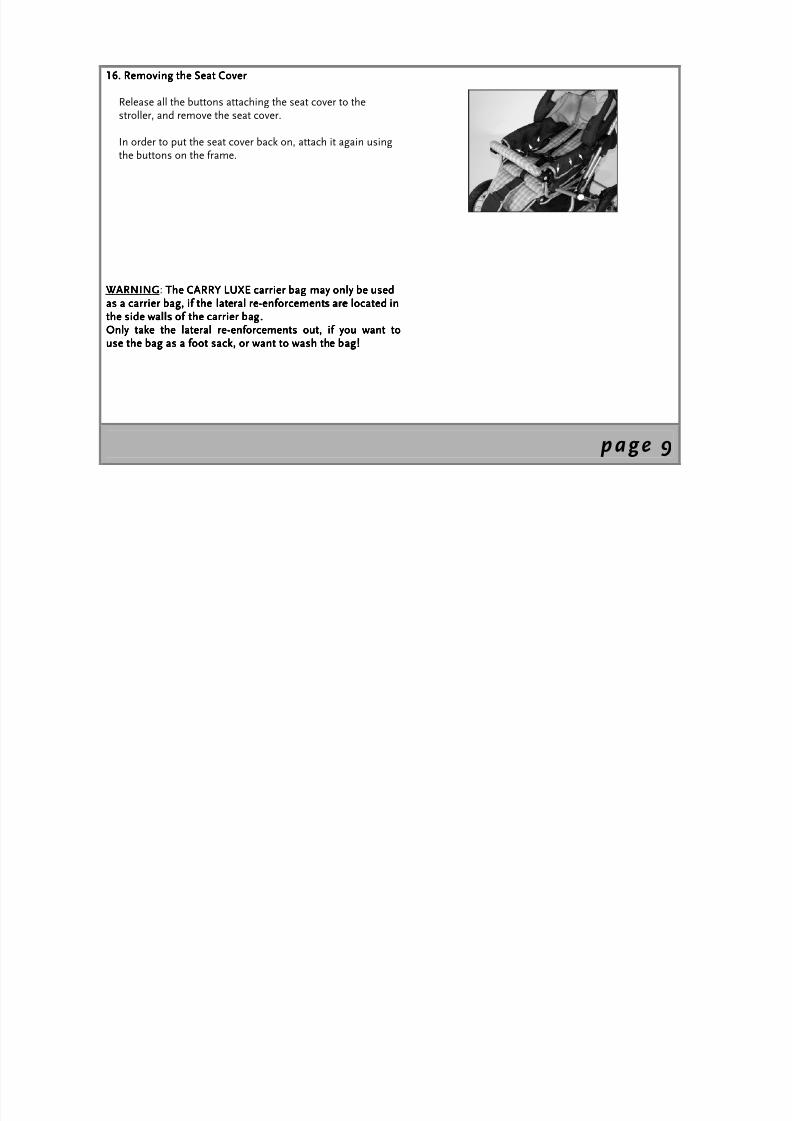
16. Removing the Seat Cover16. Removing the Seat Cover16. Removing the Seat Cover16. Removing the Seat Cover
Release all the buttons attaching the seat cover to thestroller, and remove the seat cover.
In order to put the seat cover back on, attach it again usingthe buttons on the frame.
WARNINGWARNINGWARNINGWARNING: The CARRY LUXE carrier bag may only be usedThe CARRY LUXE carrier bag may only be usedThe CARRY LUXE carrier bag may only be usedThe CARRY LUXE carrier bag may only be usedas a carrier bag, if the lateral reas a carrier bag, if the lateral reas a carrier bag, if the lateral reas a carrier bag, if the lateral re----enforcements are located inenforcements are located inenforcements are located inenforcements are located inthe side walls of the carrier bthe side walls of the carrier bthe side walls of the carrier bthe side walls of the carrier bag.ag.ag.ag.Only take the lateral reOnly take the lateral reOnly take the lateral reOnly take the lateral re----enforcements out, if you want toenforcements out, if you want toenforcements out, if you want toenforcements out, if you want touse the bag as a foot sack, or want to wash the bag!use the bag as a foot sack, or want to wash the bag!use the bag as a foot sack, or want to wash the bag!use the bag as a foot sack, or want to wash the bag!
page 9
8/6/2019 carucior_pramy_luxe
http://slidepdf.com/reader/full/caruciorpramyluxe 10/17
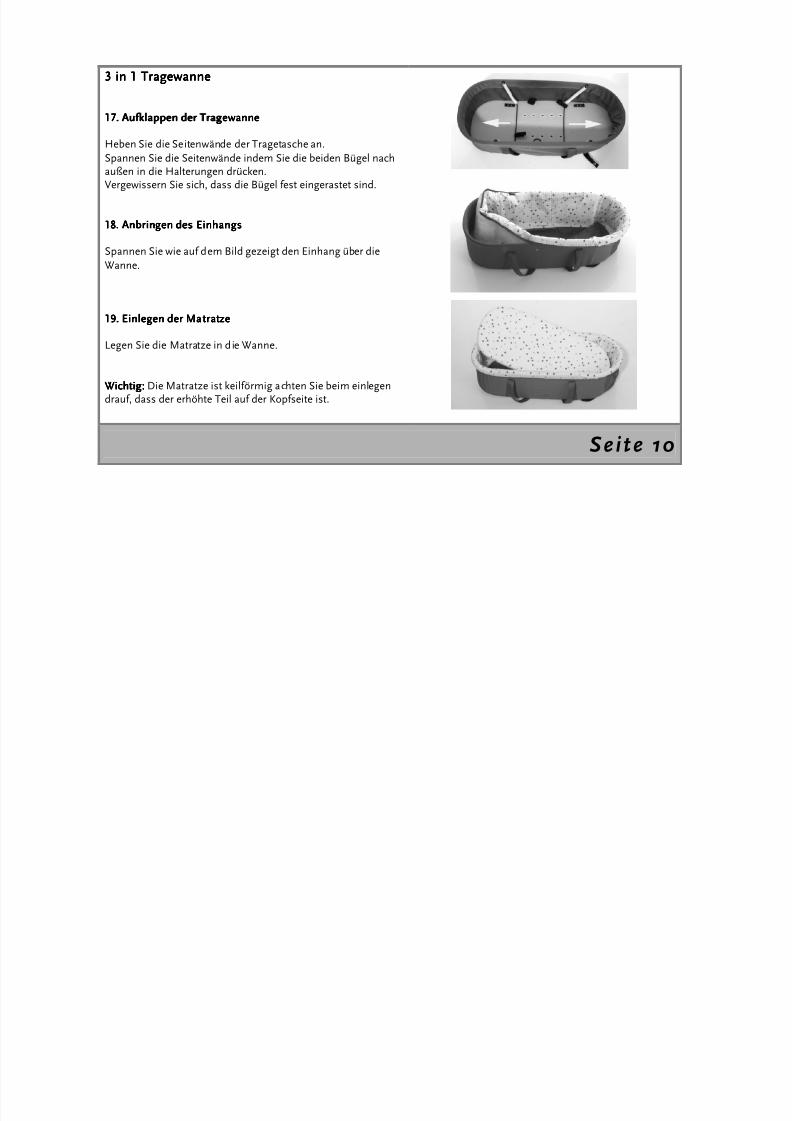
3 in 1 Tragewanne3 in 1 Tragewanne3 in 1 Tragewanne3 in 1 Tragewanne
17171717. Aufklappen der Trage. Aufklappen der Trage. Aufklappen der Trage. Aufklappen der Tragewannewannewannewanne
Heben Sie die Seitenwände der Tragetasche an.Spannen Sie die Seitenwände indem Sie die beiden Bügel nachaußen in die Halterungen drücken.Vergewissern Sie sich, dass die Bügel fest eingerastet sind.
18181818.... Anbringen des EinhangsAnbringen des EinhangsAnbringen des EinhangsAnbringen des Einhangs
Spannen Sie wie auf dem Bild gezeigt den Einhang über dieWanne.
19191919. Einlegen der Matratze. Einlegen der Matratze. Einlegen der Matratze. Einlegen der Matratze
Legen Sie die Matratze in die Wanne.
Wichtig:Wichtig:Wichtig:Wichtig: Die Matratze ist keilförmig achten Sie beim einlegendrauf, dass der erhöhte Teil auf der Kopfseite ist.
Seite 10
8/6/2019 carucior_pramy_luxe
http://slidepdf.com/reader/full/caruciorpramyluxe 11/17
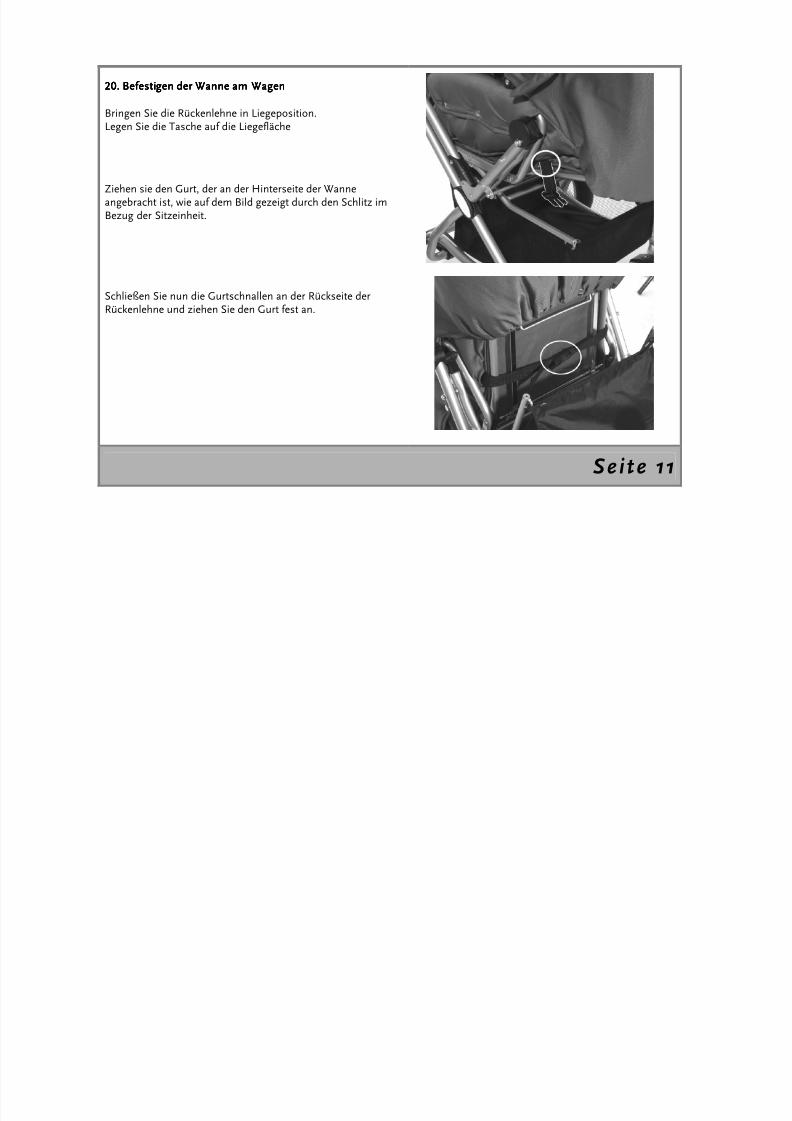
20. Befestigen der Wanne am Wagen20. Befestigen der Wanne am Wagen20. Befestigen der Wanne am Wagen20. Befestigen der Wanne am Wagen
Bringen Sie die Rückenlehne in Liegeposition.Legen Sie die Tasche auf die Liegefläche
Ziehen sie den Gurt, der an der Hinterseite der Wanneangebracht ist, wie auf dem Bild gezeigt durch den Schlitz imBezug der Sitzeinheit.
Schließen Sie nun die Gurtschnallen an der Rückseite derRückenlehne und ziehen Sie den Gurt fest an.
Seite 11
8/6/2019 carucior_pramy_luxe
http://slidepdf.com/reader/full/caruciorpramyluxe 12/17
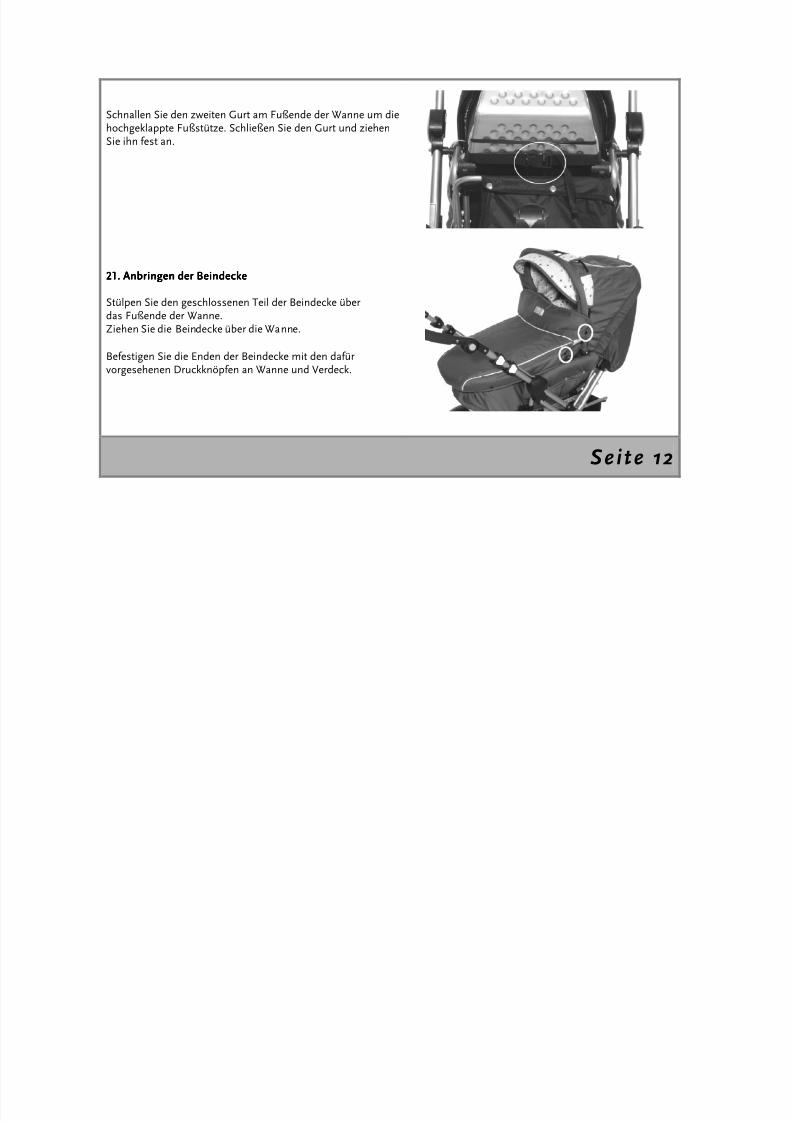
Schnallen Sie den zweiten Gurt am Fußende der Wanne um diehochgeklappte Fußstütze. Schließen Sie den Gurt und ziehenSie ihn fest an.
21212121. Anbringen der Beindecke. Anbringen der Beindecke. Anbringen der Beindecke. Anbringen der Beindecke
Stülpen Sie den geschlossenen Teil der Beindecke überdas Fußende der Wanne.Ziehen Sie die Beindecke über die Wanne.
Befestigen Sie die Enden der Beindecke mit den dafürvorgesehenen Druckknöpfen an Wanne und Verdeck.
Seite 12
8/6/2019 carucior_pramy_luxe
http://slidepdf.com/reader/full/caruciorpramyluxe 13/17
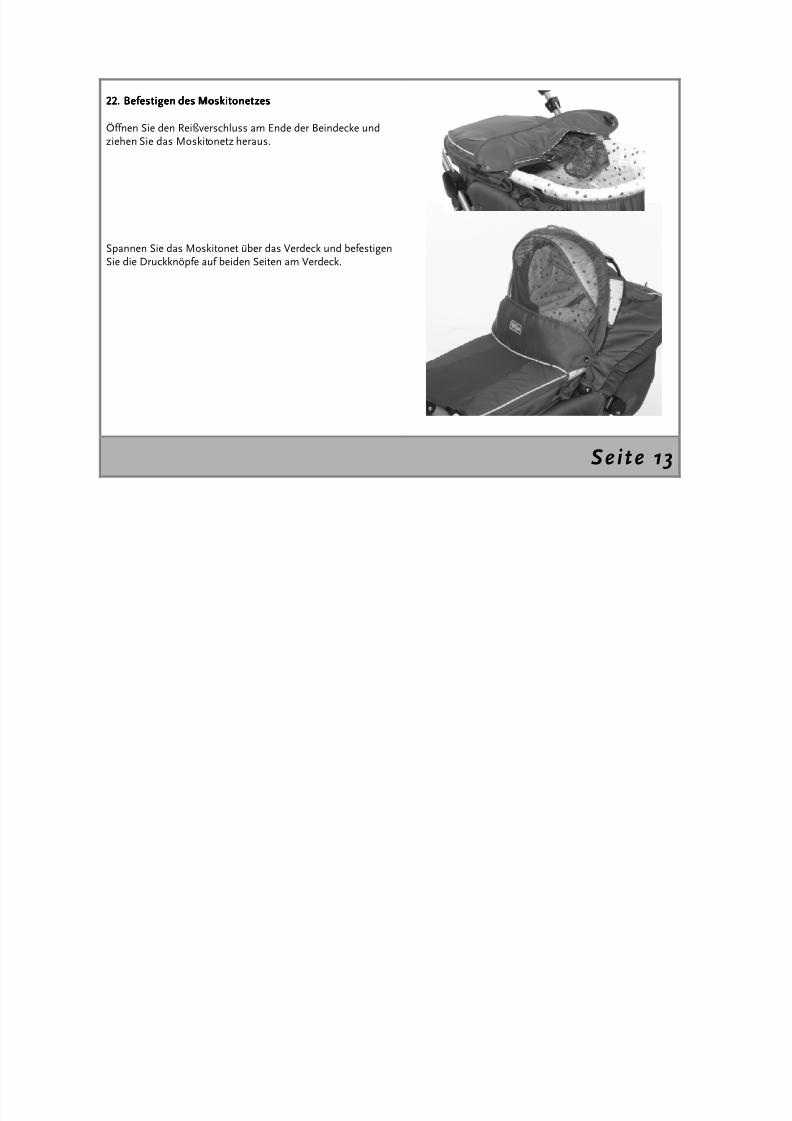
22222222.... Befestigen des MoskitonetBefestigen des MoskitonetBefestigen des MoskitonetBefestigen des Moskitonetzeszeszeszes
Öffnen Sie den Reißverschluss am Ende der Beindecke undziehen Sie das Moskitonetz heraus.
Spannen Sie das Moskitonet über das Verdeck und befestigenSie die Druckknöpfe auf beiden Seiten am Verdeck.
Seite 13
8/6/2019 carucior_pramy_luxe
http://slidepdf.com/reader/full/caruciorpramyluxe 14/17
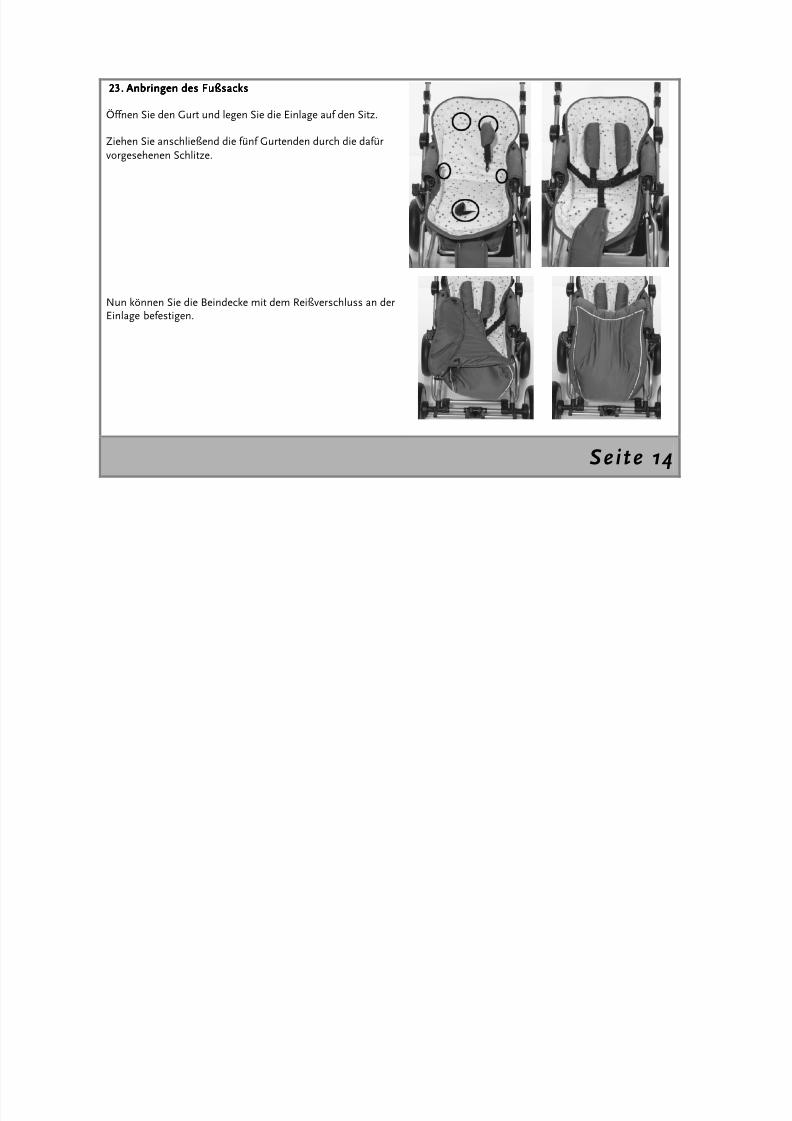
23.23.23.23. Anbringen des FußsacksAnbringen des FußsacksAnbringen des FußsacksAnbringen des Fußsacks
Öffnen Sie den Gurt und legen Sie die Einlage auf den Sitz.
Ziehen Sie anschließend die fünf Gurtenden durch die dafürvorgesehenen Schlitze.
Nun können Sie die Beindecke mit dem Reißverschluss an derEinlage befestigen.
Seite 14

8/6/2019 carucior_pramy_luxe
http://slidepdf.com/reader/full/caruciorpramyluxe 15/17
24. Anbringen der Beindecke24. Anbringen der Beindecke24. Anbringen der Beindecke24. Anbringen der Beindecke
Nehmen Sie das Unterteil des Fußsacks aus der Tasche.
Verbinden Sie Ober- und Unterteil des Fußsacks mit demReißverschluss.
Befestigen sie den Fußsack wie auf dem Bild gezeigt amKinderwagen. Verbinden Sie dazu die Druckknöpfe anBeindecke und dem Verdeck.
Seite 15
8/6/2019 carucior_pramy_luxe
http://slidepdf.com/reader/full/caruciorpramyluxe 16/17
8/6/2019 carucior_pramy_luxe
http://slidepdf.com/reader/full/caruciorpramyluxe 17/17
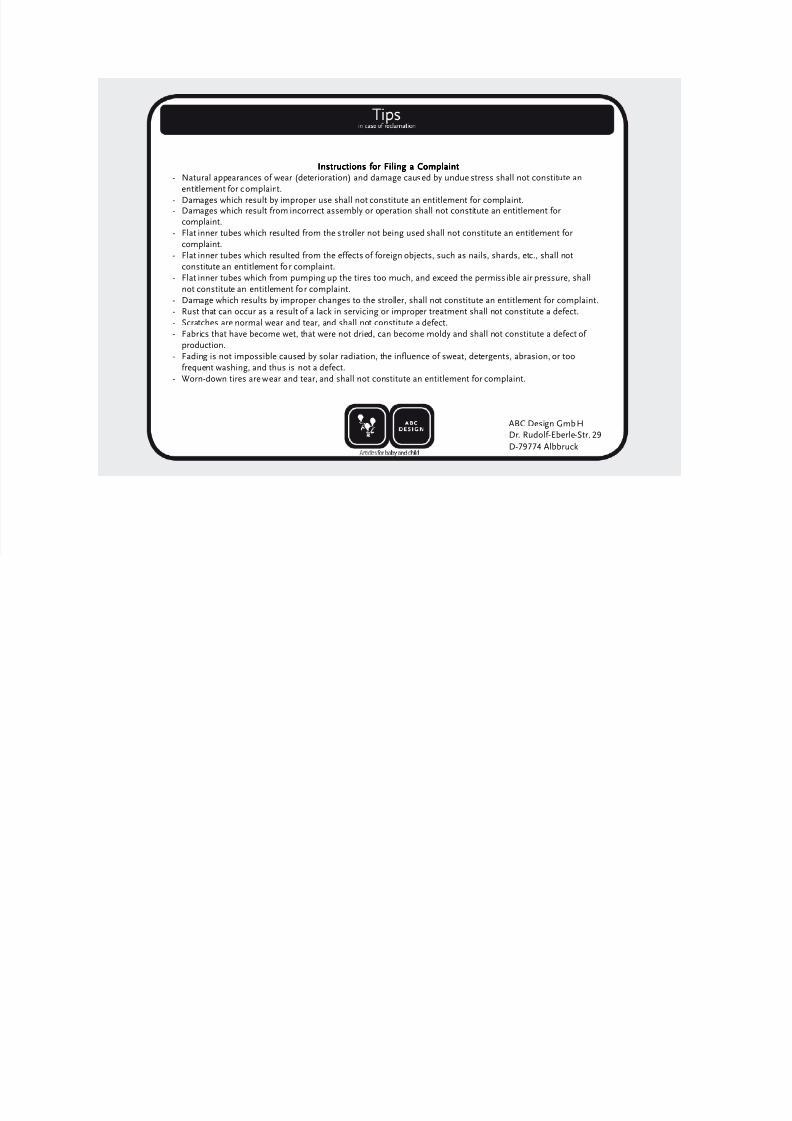
Instructions for Filing a ComplaintInstructions for Filing a ComplaintInstructions for Filing a ComplaintInstructions for Filing a Complaint- Natural appearances of wear (deterioration) and damage caused by undue stress shall not constitute an
entitlement for complaint.
- Damages which result by improper use shall not constitute an entitlement for complaint.- Damages which result from incorrect assembly or operation shall not constitute an entitlement for
complaint.- Flat inner tubes which resulted from the stroller not being used shall not constitute an entitlement for
complaint.- Flat inner tubes which resulted from the effects of foreign objects, such as nails, shards, etc., shall not
constitute an entitlement fo r complaint.- Flat inner tubes which from pumping up the tires too much, and exceed the permissible air pressure, shall
not constitute an entitlement for complaint.- Damage which results by improper changes to the stroller, shall not constitute an entitlement for complaint.- Rust that can occur as a result of a lack in servicing or improper treatment shall not constitute a defect.- Scratches are normal wear and tear, and shall not constitute a defect.- Fabrics that have become wet, that were not dried, can become moldy and shall not constitute a defect of
production.- Fading is not impossible caused by solar radiation, the influence of sweat, detergents, abrasion, or too
frequent washing, and thus is not a defect.- Worn-down tires are wear and tear, and shall not constitute an entitlement for complaint.
ABC Design GmbHDr. Rudolf-Eberle-Str. 29D-79774 Albbruck