procesare imagini pythoninf.ucv.ro/documents/cstoean/procesareimg.pdf · #pentru a putea afisa...
TRANSCRIPT
Procesare imagini Python
November 14, 2018
Catalin [email protected]://inf.ucv.ro/~cstoean
1 OpenCV in Python
1.1 Citim o imagine si o afisam intr-o fereastra
In [1]: import cv2
#citim o imagine si aflam de la aceasta lungimea x inaltimea x numarul de canaleim = cv2.imread('D:/pic.jpg')h, w, c = im.shape #intai inaltimea
#afisam in doua moduri valorile obtinute mai susprint('w = {}, h = {}, c = {}'.format(w, h, c))print('w =', w, 'h =', h, 'c =', c)
'''Afisam imaginea intr-o fereastra separata.Fereastra se inchide dupa 5 secunde.Celula curenta nu isi va incheia executia pana nu se inchide fereastra cu imaginea'''
cv2.imshow('Poza noastra', im)cv2.waitKey(5000)cv2.destroyAllWindows() #ne asiguram ca se inchide fereastra
---------------------------------------------------------------------------
AttributeError Traceback (most recent call last)
<ipython-input-1-ea34590df1d9> in <module>()3 #citim o imagine si aflam de la aceasta lungimea x inaltimea x numarul de canale4 im = cv2.imread('D:/pic.jpg')
----> 5 h, w, c = im.shape #intai inaltimea
1
67 #afisam in doua moduri valorile obtinute mai sus
AttributeError: 'NoneType' object has no attribute 'shape'
1.2 Salvarea unei imagini cu extensia dorita
In [13]: cv2.imwrite('D:/im.tif', im)
Out[13]: True
1.3 Accesam valorile unor pixeli din imagine
In [6]: #In OpenCV avem canalele in ordinea Blue, Ggreen, Red
b, g, r = im[10, 20]print('b = {}, g = {}, r = {}'.format(b, g, r))
#Afisam valorile pentru ultimii 16 pixeli din imaginefor i in range(h):
for j in range(w):b, g, r = im[i, j]if i > h - 5 and j > w - 5:
print('i = {}, j = {}, b = {}, g = {}, r = {}'.format(i, j, b, g, r))
b = 20, g = 71, r = 34i = 996, j = 2496, b = 140, g = 105, r = 19i = 996, j = 2497, b = 141, g = 106, r = 20i = 996, j = 2498, b = 141, g = 106, r = 20i = 996, j = 2499, b = 142, g = 107, r = 21i = 997, j = 2496, b = 140, g = 105, r = 19i = 997, j = 2497, b = 141, g = 106, r = 20i = 997, j = 2498, b = 141, g = 106, r = 20i = 997, j = 2499, b = 142, g = 107, r = 21i = 998, j = 2496, b = 142, g = 110, r = 21i = 998, j = 2497, b = 142, g = 110, r = 21i = 998, j = 2498, b = 142, g = 110, r = 21i = 998, j = 2499, b = 143, g = 111, r = 22i = 999, j = 2496, b = 145, g = 113, r = 24i = 999, j = 2497, b = 144, g = 112, r = 23i = 999, j = 2498, b = 144, g = 112, r = 23i = 999, j = 2499, b = 143, g = 111, r = 22
2
1.4 Extragem o regiune de interes din imagine
In [9]: # extragem o sectiune de 100x100 pixelide la x = 200, y = 100 pana la x = 300, y = 200
roi = im[100:200, 200:300]cv2.imshow("ROI", roi)cv2.waitKey(5000)cv2.destroyAllWindows()
1.5 Redimensionarea unei imagini
In [14]: imMica = cv2.resize(im, (300, 200)) #primul este w, apoi hcv2.imshow("Imaginea redimensionata", imMica)cv2.waitKey(5000)cv2.destroyAllWindows()
1.6 Desenarea unui patrat pe o imagine
In [17]: # desenam un patrat rosu cu grosimea liniei de 3 pixeliimCopie = im.copy()#daca vrem ca patratul sa fie plin, in loc de 3 vom pune un numar negativ, precum -1#imagine, colt stanga-sus, colt dreapta-jos, culoare, grosimecv2.rectangle(imCopie, (200, 100), (300, 200), (0, 0, 255), 3)cv2.imshow("Patrat", imCopie)cv2.waitKey(5000)cv2.destroyAllWindows()
1.7 Desenarea unui cerc pe o imagine
In [21]: imCopie = im.copy()#imagine, centru, raza, culoare, grosimecv2.circle(imCopie, (500, 250), 50, (0, 255, 0), 5)cv2.imshow("Cerc", imCopie)cv2.waitKey(5000)cv2.destroyAllWindows()
1.8 Desenarea unui linii pe o imagine
In [27]: imCopie = im.copy()#imagine, (x1, y1), (x2, y2), culoare, grosimecv2.line(imCopie, (100, 500), (500, 200), (0, 0, 255), 5)cv2.imshow("Linie", imCopie)cv2.waitKey(5000)cv2.destroyAllWindows()
1.9 Scriere de text pe o imagine
In [36]: imCopie = im.copy()#imagine, text, (x, y), font, marime font, culoare, grosime
3

cv2.putText(imCopie, "Functioneaza!", (200, 100),cv2.FONT_HERSHEY_SIMPLEX, 1.5, (0, 0, 255), 3)
cv2.imshow("Text", imCopie)cv2.waitKey(5000)cv2.destroyAllWindows()
2 Matplotlib pentru imagini
2.1 Citirea unei imagini
In [1]: %matplotlib inline#pentru a putea afisa imaginile in interiorul acestui notebook#(nu intr-o fereastra separata, ca la OpenCV)import matplotlib.pyplot as plt #interfata pentru afisare de imaginiimport matplotlib.image as mpimg #incarcare de imaginiimport numpy as np # pentru lucrul cu arrays
img = mpimg.imread('D:/pic.jpg')#afisam valorile pixelilorprint(img)
[[[ 41 105 19][ 24 82 5][ 13 65 1]...[ 12 34 179][ 12 34 179][ 12 34 179]]
[[ 33 96 15][ 21 82 5][ 19 75 4]...[ 12 34 179][ 12 34 179][ 12 34 179]]
[[ 11 73 0][ 24 86 9][ 57 118 38]...[ 10 35 179][ 10 35 179][ 10 35 179]]
...
[[107 101 89]
4
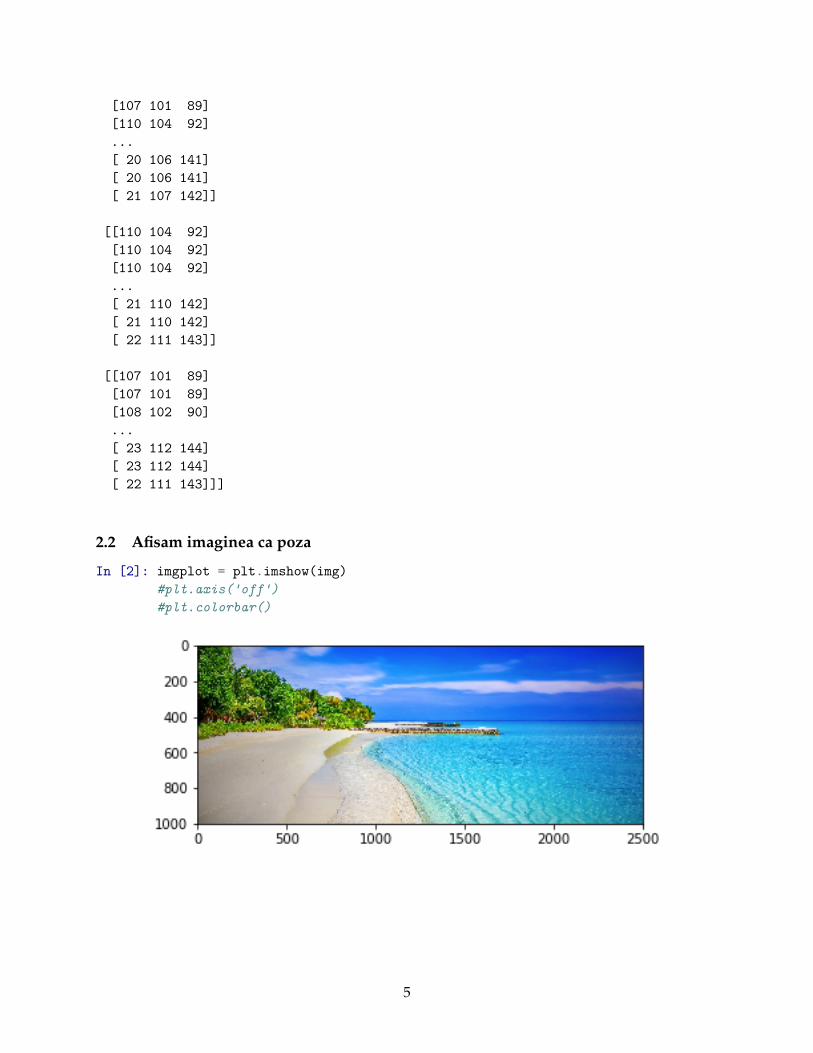
[107 101 89][110 104 92]...[ 20 106 141][ 20 106 141][ 21 107 142]]
[[110 104 92][110 104 92][110 104 92]...[ 21 110 142][ 21 110 142][ 22 111 143]]
[[107 101 89][107 101 89][108 102 90]...[ 23 112 144][ 23 112 144][ 22 111 143]]]
2.2 Afisam imaginea ca poza
In [2]: imgplot = plt.imshow(img)#plt.axis('off')#plt.colorbar()
5
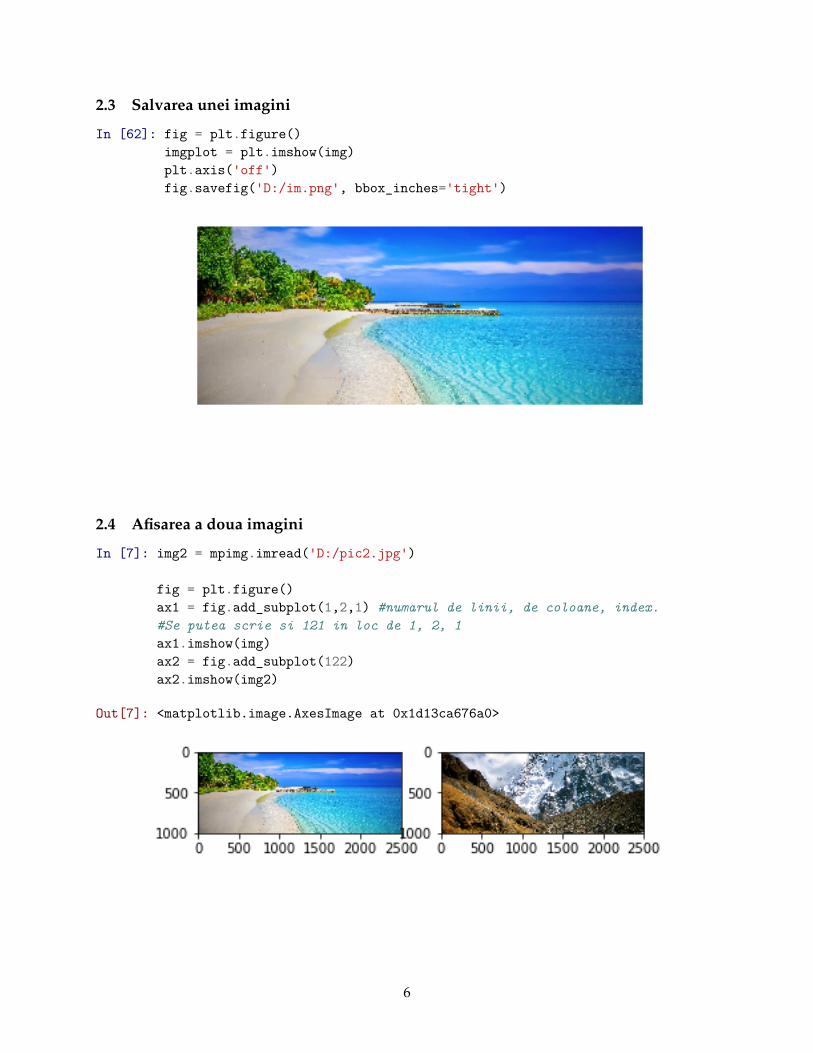
2.3 Salvarea unei imagini
In [62]: fig = plt.figure()imgplot = plt.imshow(img)plt.axis('off')fig.savefig('D:/im.png', bbox_inches='tight')
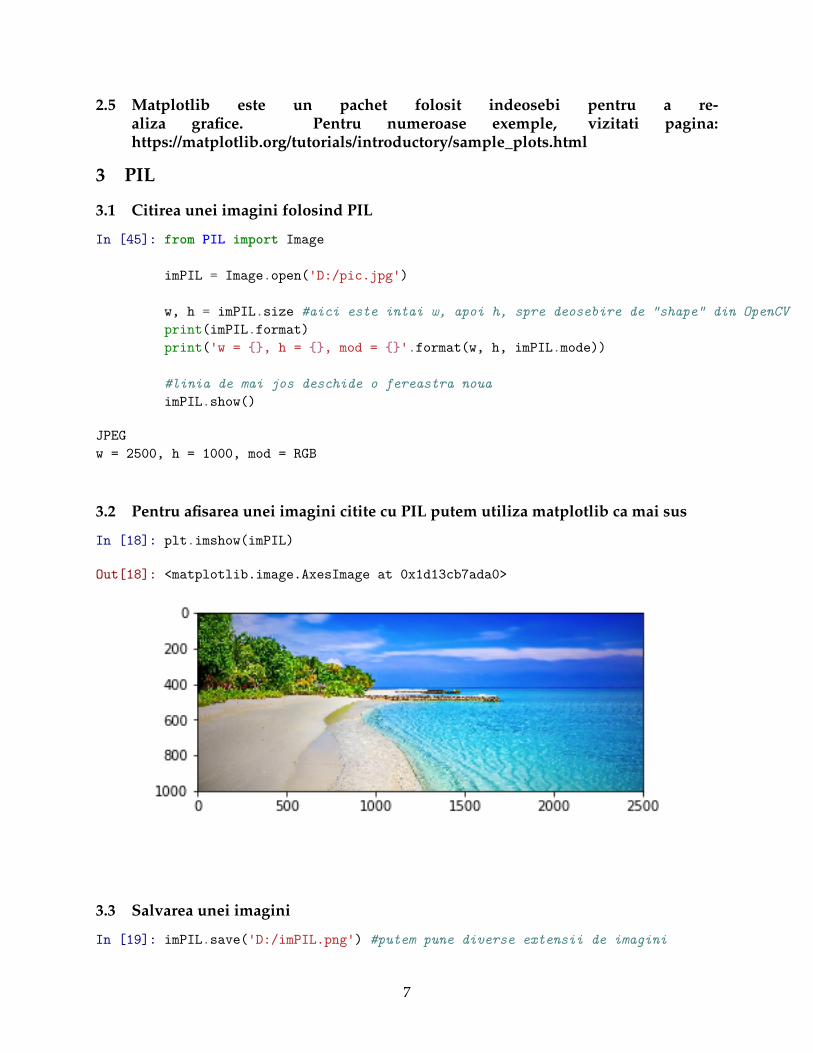
2.4 Afisarea a doua imagini
In [7]: img2 = mpimg.imread('D:/pic2.jpg')
fig = plt.figure()ax1 = fig.add_subplot(1,2,1) #numarul de linii, de coloane, index.#Se putea scrie si 121 in loc de 1, 2, 1ax1.imshow(img)ax2 = fig.add_subplot(122)ax2.imshow(img2)
Out[7]: <matplotlib.image.AxesImage at 0x1d13ca676a0>
6
2.5 Matplotlib este un pachet folosit indeosebi pentru a re-aliza grafice. Pentru numeroase exemple, vizitati pagina:https://matplotlib.org/tutorials/introductory/sample_plots.html
3 PIL
3.1 Citirea unei imagini folosind PIL
In [45]: from PIL import Image
imPIL = Image.open('D:/pic.jpg')
w, h = imPIL.size #aici este intai w, apoi h, spre deosebire de "shape" din OpenCVprint(imPIL.format)print('w = {}, h = {}, mod = {}'.format(w, h, imPIL.mode))
#linia de mai jos deschide o fereastra nouaimPIL.show()
JPEGw = 2500, h = 1000, mod = RGB
3.2 Pentru afisarea unei imagini citite cu PIL putem utiliza matplotlib ca mai sus
In [18]: plt.imshow(imPIL)
Out[18]: <matplotlib.image.AxesImage at 0x1d13cb7ada0>
3.3 Salvarea unei imagini
In [19]: imPIL.save('D:/imPIL.png') #putem pune diverse extensii de imagini
7
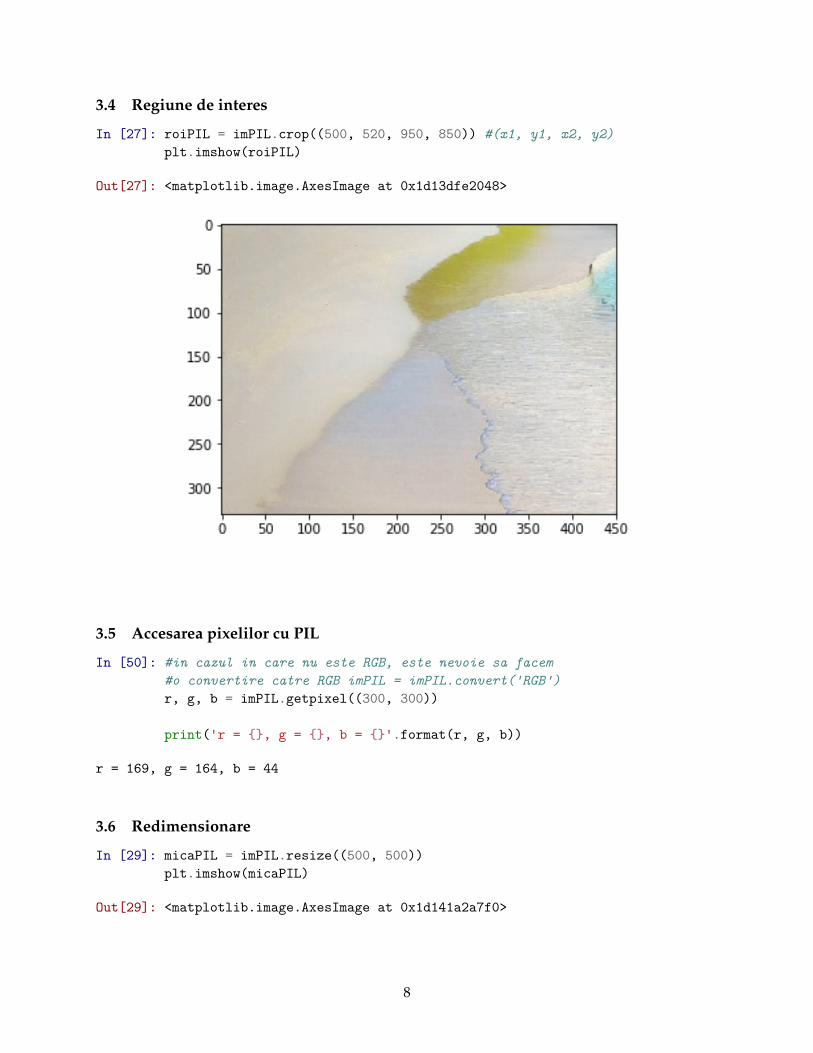
3.4 Regiune de interes
In [27]: roiPIL = imPIL.crop((500, 520, 950, 850)) #(x1, y1, x2, y2)plt.imshow(roiPIL)
Out[27]: <matplotlib.image.AxesImage at 0x1d13dfe2048>
3.5 Accesarea pixelilor cu PIL
In [50]: #in cazul in care nu este RGB, este nevoie sa facem#o convertire catre RGB imPIL = imPIL.convert('RGB')r, g, b = imPIL.getpixel((300, 300))
print('r = {}, g = {}, b = {}'.format(r, g, b))
r = 169, g = 164, b = 44
3.6 Redimensionare
In [29]: micaPIL = imPIL.resize((500, 500))plt.imshow(micaPIL)
Out[29]: <matplotlib.image.AxesImage at 0x1d141a2a7f0>
8

3.7 Convertirea la nuante de gri
In [30]: grayPIL = imPIL.convert('L')plt.imshow(grayPIL)
Out[30]: <matplotlib.image.AxesImage at 0x1d13de7da90>
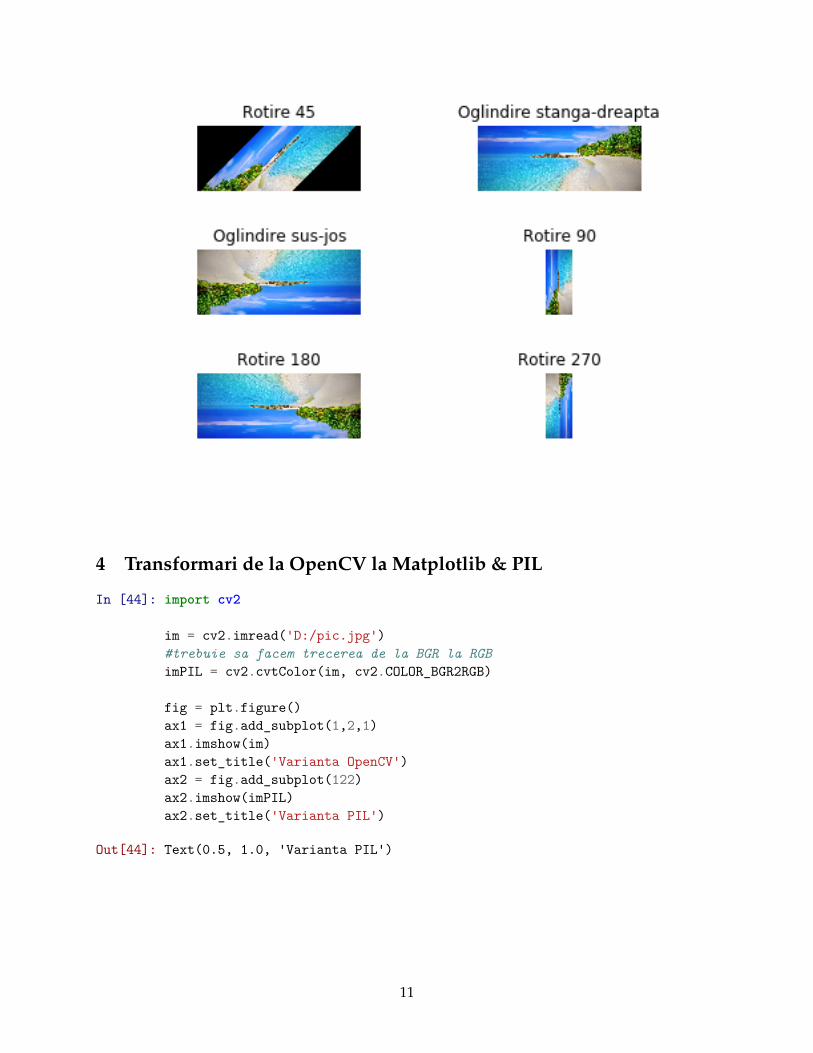
3.8 Transformari asupra imaginilor
In [41]: imRot = imPIL.rotate(45)flip1 = imPIL.transpose(Image.FLIP_LEFT_RIGHT)
9
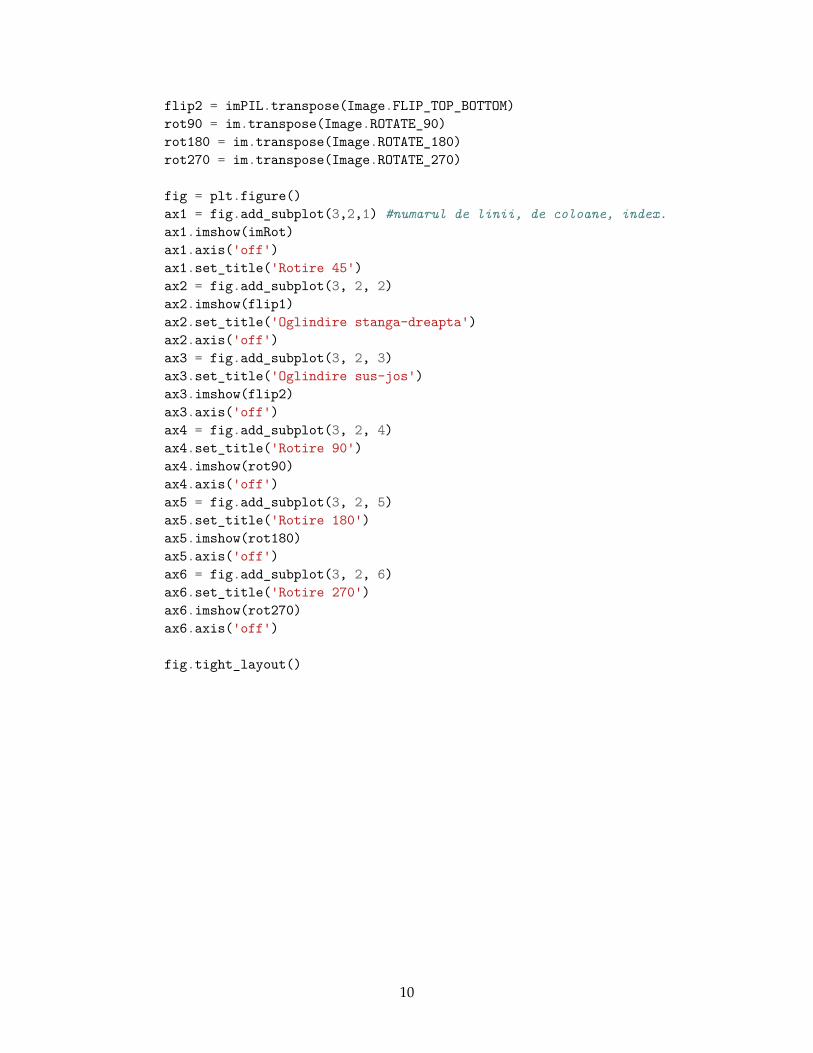
flip2 = imPIL.transpose(Image.FLIP_TOP_BOTTOM)rot90 = im.transpose(Image.ROTATE_90)rot180 = im.transpose(Image.ROTATE_180)rot270 = im.transpose(Image.ROTATE_270)
fig = plt.figure()ax1 = fig.add_subplot(3,2,1) #numarul de linii, de coloane, index.ax1.imshow(imRot)ax1.axis('off')ax1.set_title('Rotire 45')ax2 = fig.add_subplot(3, 2, 2)ax2.imshow(flip1)ax2.set_title('Oglindire stanga-dreapta')ax2.axis('off')ax3 = fig.add_subplot(3, 2, 3)ax3.set_title('Oglindire sus-jos')ax3.imshow(flip2)ax3.axis('off')ax4 = fig.add_subplot(3, 2, 4)ax4.set_title('Rotire 90')ax4.imshow(rot90)ax4.axis('off')ax5 = fig.add_subplot(3, 2, 5)ax5.set_title('Rotire 180')ax5.imshow(rot180)ax5.axis('off')ax6 = fig.add_subplot(3, 2, 6)ax6.set_title('Rotire 270')ax6.imshow(rot270)ax6.axis('off')
fig.tight_layout()
10
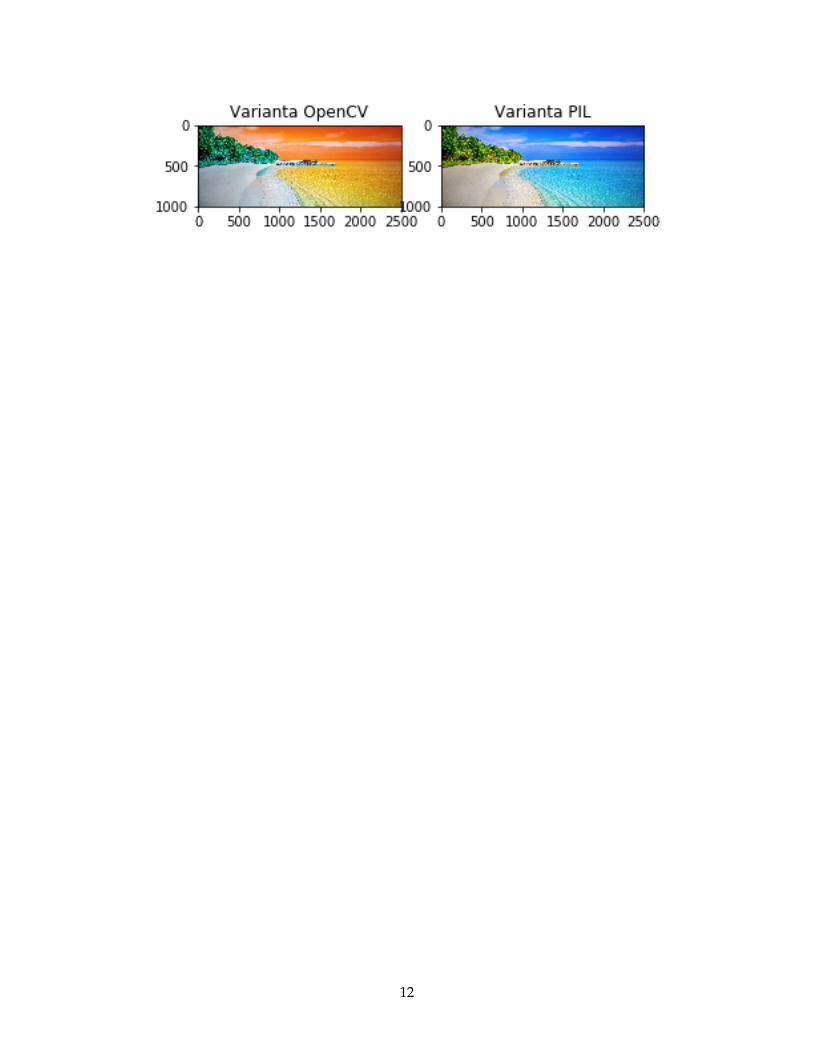
4 Transformari de la OpenCV la Matplotlib & PIL
In [44]: import cv2
im = cv2.imread('D:/pic.jpg')#trebuie sa facem trecerea de la BGR la RGBimPIL = cv2.cvtColor(im, cv2.COLOR_BGR2RGB)
fig = plt.figure()ax1 = fig.add_subplot(1,2,1)ax1.imshow(im)ax1.set_title('Varianta OpenCV')ax2 = fig.add_subplot(122)ax2.imshow(imPIL)ax2.set_title('Varianta PIL')
Out[44]: Text(0.5, 1.0, 'Varianta PIL')
11
12