cmpic 2 comenzile
TRANSCRIPT
8/10/2019 CMPIC 2 COMENZILE
http://slidepdf.com/reader/full/cmpic-2-comenzile 1/6
CMPIC Help: System Orientation
From Cloudis CMPIC Wiki
Contents
1 Starting and Accessing CMPIC
2 What is the Navigator?
3 How do I use the CMPIC Navigator?
4 What do CMPIC screens look like?
5 What is the Toolbar?
6 How do I use the Toolbar?
7 Other Shortcut Keys
8 Why are some fields different colours?
Starting and Accessing CMPIC
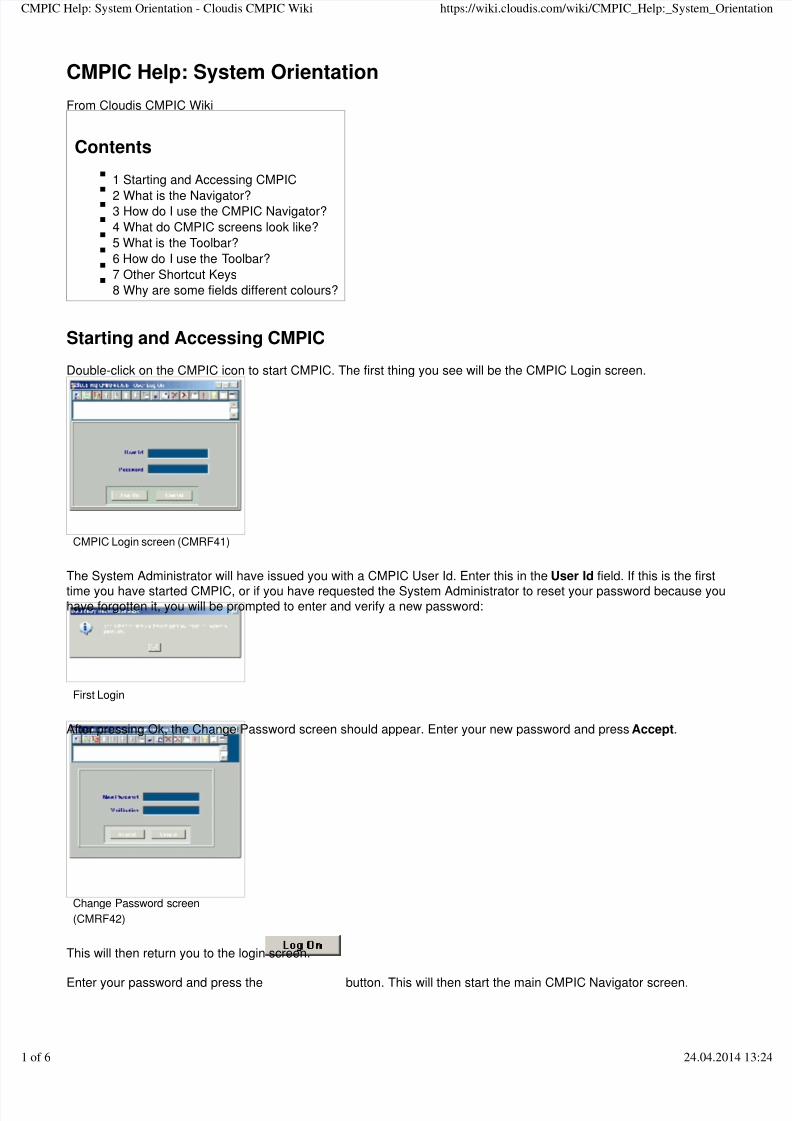
Double-click on the CMPIC icon to start CMPIC. The first thing you see will be the CMPIC Login screen.
CMPIC Login screen (CMRF41)
The System Administrator will have issued you with a CMPIC User Id. Enter this in the User Id field. If this is the firsttime you have started CMPIC, or if you have requested the System Administrator to reset your password because youhave forgotten it, you will be prompted to enter and verify a new password:
First Login
After pressing Ok, the Change Password screen should appear. Enter your new password and press Accept.
Change Password screen
(CMRF42)
This will then return you to the login screen.
Enter your password and press the button. This will then start the main CMPIC Navigator screen.
PIC Help: System Orientation - Cloudis CMPIC Wiki https://wiki.cloudis.com/wiki/CMPIC_Help:_System_Orientation
6 24.04.2014 13:24
8/10/2019 CMPIC 2 COMENZILE
http://slidepdf.com/reader/full/cmpic-2-comenzile 2/6
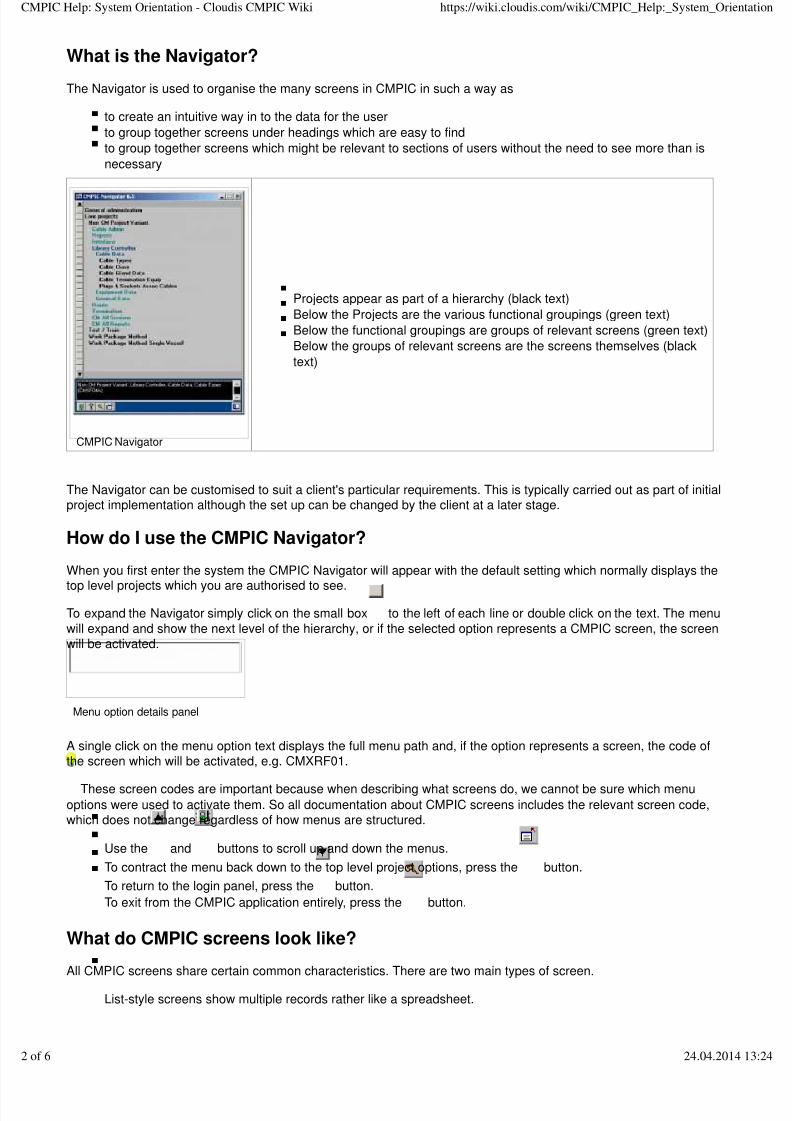
What is the Navigator?
The Navigator is used to organise the many screens in CMPIC in such a way as
to create an intuitive way in to the data for the user
to group together screens under headings which are easy to find
to group together screens which might be relevant to sections of users without the need to see more than is
necessary
CMPIC Navigator
Projects appear as part of a hierarchy (black text)
Below the Projects are the various functional groupings (green text)
Below the functional groupings are groups of relevant screens (green text)
Below the groups of relevant screens are the screens themselves (black
text)
The Navigator can be customised to suit a client's particular requirements. This is typically carried out as part of initialproject implementation although the set up can be changed by the client at a later stage.
How do I use the CMPIC Navigator?
When you first enter the system the CMPIC Navigator will appear with the default setting which normally displays thetop level projects which you are authorised to see.
To expand the Navigator simply click on the small box to the left of each line or double click on the text. The menu
will expand and show the next level of the hierarchy, or if the selected option represents a CMPIC screen, the screenwill be activated.
Menu option details panel
A single click on the menu option text displays the full menu path and, if the option represents a screen, the code ofthe screen which will be activated, e.g. CMXRF01.
These screen codes are important because when describing what screens do, we cannot be sure which menu
options were used to activate them. So all documentation about CMPIC screens includes the relevant screen code,which does not change regardless of how menus are structured.
Use the and buttons to scroll up and down the menus.
To contract the menu back down to the top level project options, press the button.
To return to the login panel, press the button.
To exit from the CMPIC application entirely, press the button.
What do CMPIC screens look like?
All CMPIC screens share certain common characteristics. There are two main types of screen.
List-style screens show multiple records rather like a spreadsheet.
PIC Help: System Orientation - Cloudis CMPIC Wiki https://wiki.cloudis.com/wiki/CMPIC_Help:_System_Orientation
6 24.04.2014 13:24
8/10/2019 CMPIC 2 COMENZILE
http://slidepdf.com/reader/full/cmpic-2-comenzile 3/6
Parent-child screens are arranged in one or more "blocks". The first block represents a parent record, and one
or more subsidiary blocks represent child records. The parent block usually shows one record at a time, whilst
the child blocks are usually multi-record. Child blocks are usually synchronised with the parent, so that when
the parent record changes, the relevant child records also change.
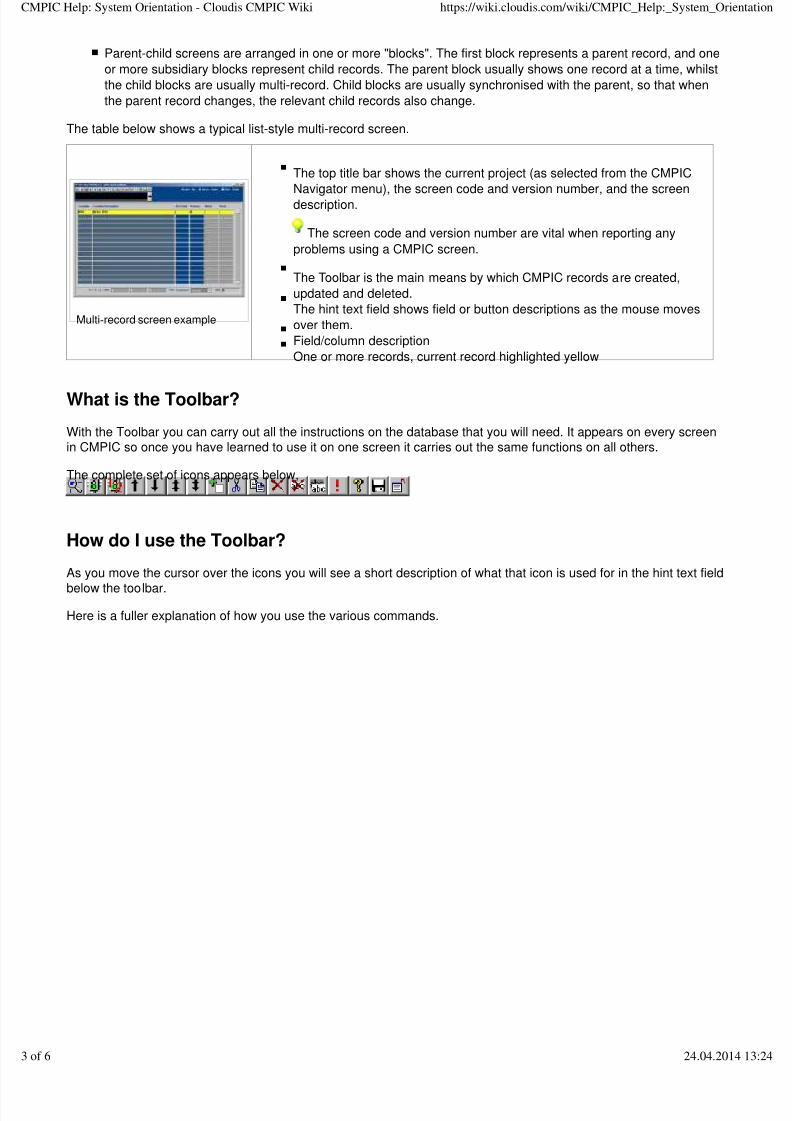
The table below shows a typical list-style multi-record screen.
Multi-record screen example
The top title bar shows the current project (as selected from the CMPIC
Navigator menu), the screen code and version number, and the screendescription.
The screen code and version number are vital when reporting any
problems using a CMPIC screen.
The Toolbar is the main means by which CMPIC records are created,
updated and deleted.
The hint text field shows field or button descriptions as the mouse moves
over them.
Field/column description
One or more records, current record highlighted yellow
What is the Toolbar?
With the Toolbar you can carry out all the instructions on the database that you will need. It appears on every screenin CMPIC so once you have learned to use it on one screen it carries out the same functions on all others.
The complete set of icons appears below,
How do I use the Toolbar?
As you move the cursor over the icons you will see a short description of what that icon is used for in the hint text fieldbelow the toolbar.
Here is a fuller explanation of how you use the various commands.
PIC Help: System Orientation - Cloudis CMPIC Wiki https://wiki.cloudis.com/wiki/CMPIC_Help:_System_Orientation
6 24.04.2014 13:24
8/10/2019 CMPIC 2 COMENZILE
http://slidepdf.com/reader/full/cmpic-2-comenzile 4/6
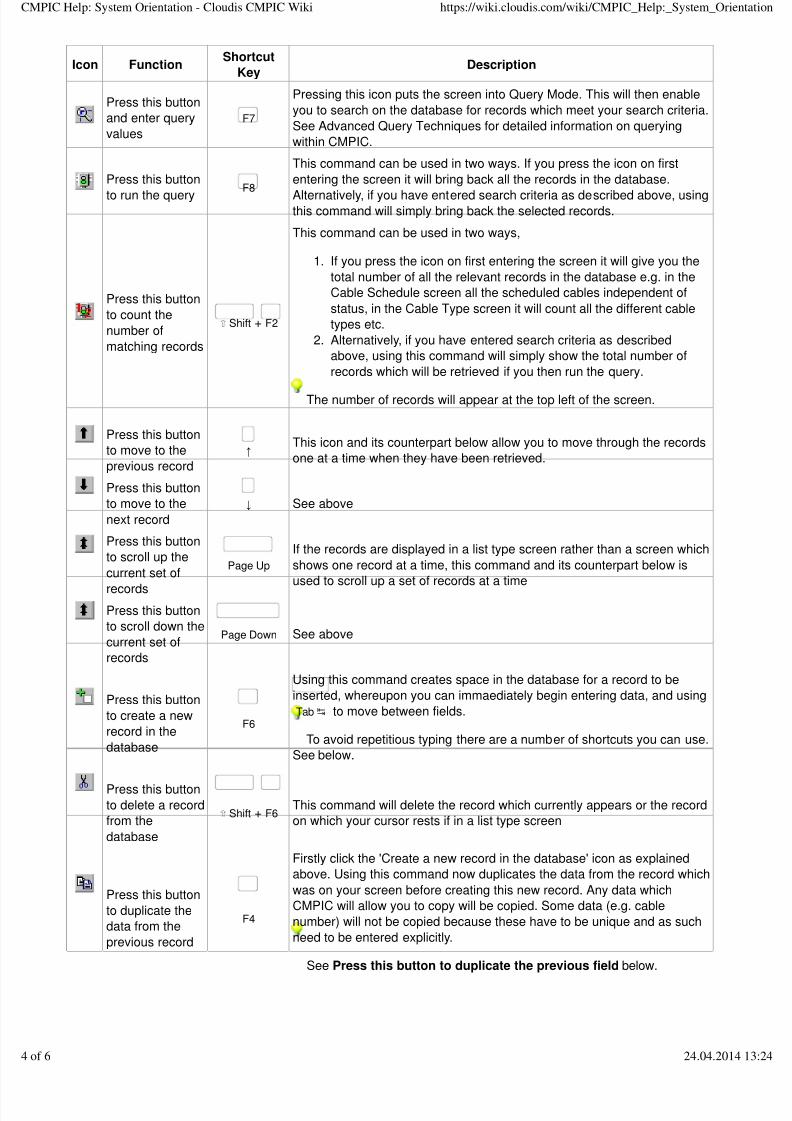
Icon FunctionShortcut
KeyDescription
Press this button
and enter query
values
F7
Pressing this icon puts the screen into Query Mode. This will then enable
you to search on the database for records which meet your search criteria.
See Advanced Query Techniques for detailed information on querying
within CMPIC.
Press this button
to run the query F8
This command can be used in two ways. If you press the icon on first
entering the screen it will bring back all the records in the database.
Alternatively, if you have entered search criteria as described above, using
this command will simply bring back the selected records.
Press this button
to count the
number of
matching records
⇧ Shift + F2
This command can be used in two ways,
If you press the icon on first entering the screen it will give you the
total number of all the relevant records in the database e.g. in the
Cable Schedule screen all the scheduled cables independent of
status, in the Cable Type screen it will count all the different cable
types etc.
1.
Alternatively, if you have entered search criteria as described
above, using this command will simply show the total number of
records which will be retrieved if you then run the query.
2.
The number of records will appear at the top left of the screen.
Press this button
to move to the
previous record
↑This icon and its counterpart below allow you to move through the records
one at a time when they have been retrieved.
Press this button
to move to the
next record
↓ See above
Press this button
to scroll up thecurrent set of
records
Page Up
If the records are displayed in a list type screen rather than a screen which
shows one record at a time, this command and its counterpart below isused to scroll up a set of records at a time
Press this button
to scroll down the
current set of
records
Page Down See above
Press this button
to create a new
record in the
database
F6
Using this command creates space in the database for a record to be
inserted, whereupon you can immaediately begin entering data, and using
Tab↹ to move between fields.
To avoid repetitious typing there are a number of shortcuts you can use.
See below.
Press this button
to delete a record
from the
database
⇧ Shift + F6This command will delete the record which currently appears or the record
on which your cursor rests if in a list type screen
Press this button
to duplicate the
data from the
previous record
F4
Firstly click the 'Create a new record in the database' icon as explained
above. Using this command now duplicates the data from the record which
was on your screen before creating this new record. Any data which
CMPIC will allow you to copy will be copied. Some data (e.g. cable
number) will not be copied because these have to be unique and as such
need to be entered explicitly.
See Press this button to duplicate the previous field below.
PIC Help: System Orientation - Cloudis CMPIC Wiki https://wiki.cloudis.com/wiki/CMPIC_Help:_System_Orientation
6 24.04.2014 13:24
8/10/2019 CMPIC 2 COMENZILE
http://slidepdf.com/reader/full/cmpic-2-comenzile 5/6
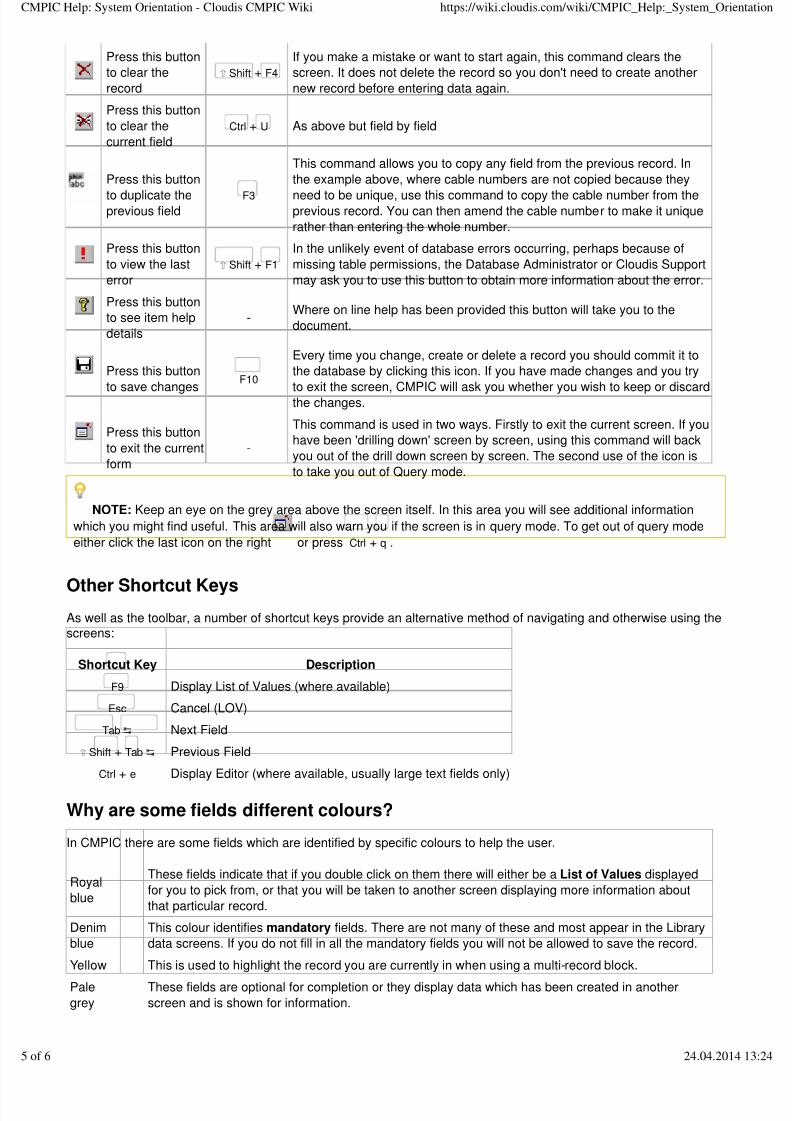
Press this button
to clear the
record
⇧ Shift + F4
If you make a mistake or want to start again, this command clears the
screen. It does not delete the record so you don't need to create another
new record before entering data again.
Press this button
to clear the
current field
Ctrl + U As above but field by field
Press this button
to duplicate the
previous field
F3
This command allows you to copy any field from the previous record. In
the example above, where cable numbers are not copied because they
need to be unique, use this command to copy the cable number from the
previous record. You can then amend the cable number to make it unique
rather than entering the whole number.
Press this button
to view the last
error
⇧ Shift + F1
In the unlikely event of database errors occurring, perhaps because of
missing table permissions, the Database Administrator or Cloudis Support
may ask you to use this button to obtain more information about the error.
Press this button
to see item help
details
-Where on line help has been provided this button will take you to the
document.
Press this buttonto save changes
F10
Every time you change, create or delete a record you should commit it to
the database by clicking this icon. If you have made changes and you tryto exit the screen, CMPIC will ask you whether you wish to keep or discard
the changes.
Press this button
to exit the current
form
-
This command is used in two ways. Firstly to exit the current screen. If you
have been 'drilling down' screen by screen, using this command will back
you out of the drill down screen by screen. The second use of the icon is
to take you out of Query mode.
NOTE: Keep an eye on the grey area above the screen itself. In this area you will see additional information
which you might find useful. This area will also warn you if the screen is in query mode. To get out of query mode
either click the last icon on the right or press Ctrl + q .
Other Shortcut Keys
As well as the toolbar, a number of shortcut keys provide an alternative method of navigating and otherwise using thescreens:
Shortcut Key Description
F9 Display List of Values (where available)
Esc Cancel (LOV)
Tab↹ Next Field
⇧ Shift + Tab↹ Previous Field
Ctrl + e Display Editor (where available, usually large text fields only)
Why are some fields different colours?
In CMPIC there are some fields which are identified by specific colours to help the user.
Royal
blue
These fields indicate that if you double click on them there will either be a List of Values displayed
for you to pick from, or that you will be taken to another screen displaying more information about
that particular record.
Denim
blue
This colour identifies mandatory fields. There are not many of these and most appear in the Library
data screens. If you do not fill in all the mandatory fields you will not be allowed to save the record.
Yellow This is used to highlight the record you are currently in when using a multi-record block.
Pale
grey
These fields are optional for completion or they display data which has been created in another
screen and is shown for information.
PIC Help: System Orientation - Cloudis CMPIC Wiki https://wiki.cloudis.com/wiki/CMPIC_Help:_System_Orientation
6 24.04.2014 13:24

8/10/2019 CMPIC 2 COMENZILE
http://slidepdf.com/reader/full/cmpic-2-comenzile 6/6
Retrieved from "https://wiki.cloudis.com/mediawiki/index.php?title=CMPIC_Help:_System_Orientation&oldid=5037"
Categories: CMPIC Overview CMPIC FAQ CMPIC Help CMPIC Knowledge Base
This page was last modified on 4 March 2013, at 10:33.
This page has been accessed 88 times.
Copyright Cloudis Ltd 2014
PIC Help: System Orientation - Cloudis CMPIC Wiki https://wiki.cloudis.com/wiki/CMPIC_Help:_System_Orientation